The M.2 SSD has become increasingly popular due to its compact size, high speed, and versatility. Whether you have just purchased a new M.2 SSD or want to reformat an existing one, this step-by-step guide will walk you through the process of formatting your M.2 SSD. By following these instructions, you will be able to optimize your drive’s performance and ensure it is ready to store your data efficiently.
What Is an M.2 SSD?
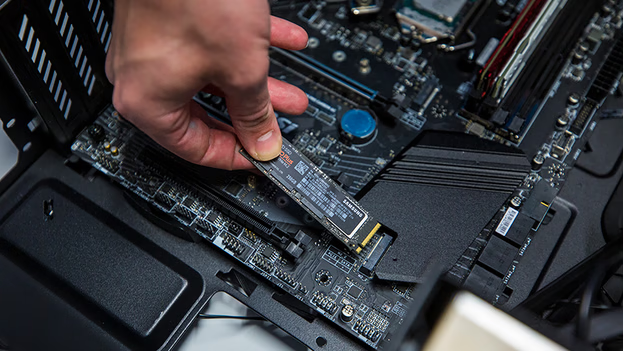
Before diving into the formatting process, it’s essential to understand what an M.2 SSD is and how it differs from other types of solid-state drives (SSDs). M.2 SSDs are small, rectangular-shaped storage devices that connect directly to the motherboard of your computer. They come in different lengths and widths, with various keying options to ensure compatibility with different types of slots on the motherboard.
M.2 SSDs can be categorized into two main types: SATA-based and NVMe-based. SATA-based M.2 SSDs operate using the same protocol as traditional SATA SSDs, while NVMe-based M.2 SSDs utilize the faster NVMe (Non-Volatile Memory Express) protocol. NVMe-based M.2 SSDs offer significantly higher speeds and are the preferred choice for those seeking maximum performance. Understanding the type of M.2 SSD you have is crucial as it can affect the formatting process.
Formatting an M.2 SSD in Windows 10/11
If you are using the latest operating system, Windows 11, formatting your M.2 SSD is a straightforward process. Follow these steps:
- Press the Windows key + X on your keyboard and select “Disk Management” from the menu that appears.
- Locate your M.2 SSD in the list of drives.
- Right-click on the M.2 SSD and select “Format” from the drop-down menu.
- Choose the desired file system, allocation unit size, and volume label.
- Click “OK” to start the formatting process.
Formatting your M.2 SSD in Windows 11 is quick and efficient, ensuring that the drive is ready for use.
Formatting an M.2 SSD in BIOS
Formatting your M.2 SSD in the BIOS is another option, especially if you want to perform a low-level format or encounter issues with the operating system. Here are the steps to format your M.2 SSD in the BIOS:
- Restart your computer and enter the BIOS by pressing the designated key during the boot process (typically Del or F2).
- Navigate to the “Storage” or “Advanced” section in the BIOS menu.
- Locate your M.2 SSD in the list of storage devices.
- Select the M.2 SSD and choose the option to format or initialize the drive.
- Follow the on-screen instructions to complete the formatting process.
Keep in mind that formatting your M.2 SSD in the BIOS should be approached with caution, as it can lead to data loss if not done correctly. Make sure to back up your important files before proceeding.
Formatting an M.2 SSD using Command Prompt
For advanced users or those who prefer a command-line approach, formatting your M.2 SSD using Command Prompt is a viable option. Here’s how to do it:
- Press the Windows key + X on your keyboard and select “Command Prompt (Admin)” from the menu.
- In the Command Prompt window, type “diskpart” and press Enter to open the DiskPart utility.
- Type “list disk” and press Enter to view the list of available disks.
- Identify your M.2 SSD based on its size and other characteristics.
- Type “select disk X” (replace X with the number corresponding to your M.2 SSD) and press Enter.
- Type “clean” and press Enter to remove all partitions and data on the M.2 SSD.
- Type “create partition primary” and press Enter to create a new primary partition.
- Type “format fs=ntfs quick” and press Enter to format the partition with the NTFS file system.
- Type “assign letter=X” (replace X with the desired drive letter) and press Enter to assign a drive letter to the formatted partition.
By following these steps in Command Prompt, you can format your M.2 SSD efficiently and customize the settings according to your needs.
Common issues and troubleshooting tips
While formatting your M.2 SSD is usually a straightforward process, you may encounter some common issues. Here are a few troubleshooting tips to help you overcome these challenges:
- Incompatible file system: Ensure that you choose a file system compatible with your operating system and intended usage. NTFS is the most widely supported file system for Windows.
- Unrecognized drive: If your M.2 SSD is not recognized by your computer, check the connection and make sure it is properly seated in the M.2 slot. You may also need to update your motherboard’s BIOS.
- Slow formatting: If the formatting process is taking longer than expected, it could indicate a problem with your M.2 SSD or system configuration. Consider updating your device drivers and firmware for optimal performance.
If you encounter any other issues while formatting your M.2 SSD, consult the manufacturer’s documentation or seek assistance from a qualified professional.
Conclusion
Formatting your M.2 SSD is a necessary step to ensure optimal performance and compatibility with your system. Whether you are using Windows 10 or the latest Windows 11, or prefer formatting in the BIOS or Command Prompt, this guide has provided you with step-by-step instructions to make the process seamless. Remember to back up your important data before formatting, and troubleshoot any issues that may arise. By following this guide, you can confidently format your M.2 SSD and unleash its full potential.